ANY-maze Help > The ANY-maze reference > The Protocol page > The elements of a protocol > Testing > Procedures > Time markers
Time markers
![]()
Introduction
Time markers are specific time points in a test that can be set using an Action. Setting a time marker inserts a specific, named marker point within the set of results for a given test, and that time marker can then be used for analysis.
For example, you may have an animal in an environment where it can move freely between zones. The animal has a sensor attached which monitors some aspect of its brain activity. At some point, it will move into a zone where it is given a stimulus, and you want to measure the value of the sensor at the point that it received this stimulus (i.e. at the point where it moves into the zone). In fact, you would probably want to start monitoring the sensor for a short time before the animal enters the zone, and see what effect the stimulus has on its brain activity.
So how could you achieve this, given that you have no idea when the animal is actually going to enter the zone? Well, this is what Time markers are for.
You would set up a procedure to wait until the animal entered the zone in question, and then use an action to set a time marker at this point. This time marker can then be used in the rest of the protocol in one of two ways:
| • | For analysis of time periods |
| • | As a point for measurement of a baseline value for a signal input |
Creating a time marker
You can create a time marker in one of three ways:
| • | Click the |
| • | Select the procedure editor's Actions tab, open the Analysis group, and drag the Set a time marker action into your procedure at the point that you require it to be set. Once you've done this, click on the |
| • | On the Variables tab, right click anywhere and select |
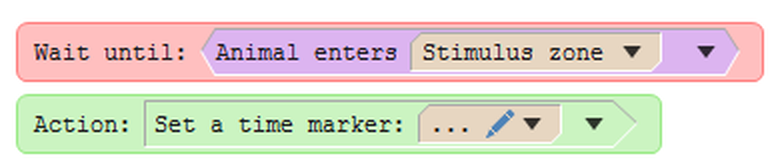
Figure 1. A procedure that will set a time marker.
| When the procedure editor is in 'Simple' mode, the |
Once you've set up a time marker in a procedure, you can use it in the protocol for analysis of a time period, or with a signal input.
Using time markers for analysis of time periods
Once you've used the procedure editor to create a time marker, you can change to the Protocol page and select Analysis across time in the protocol list. Right click to create a new time period, and select This time period is based on the following time marker. You'll find in the drop-down list the time marker that you just created in the procedure editor, and you can choose when you want your time period to start based on the time marker (you can start the time period on, before, or after the time marker that you set).
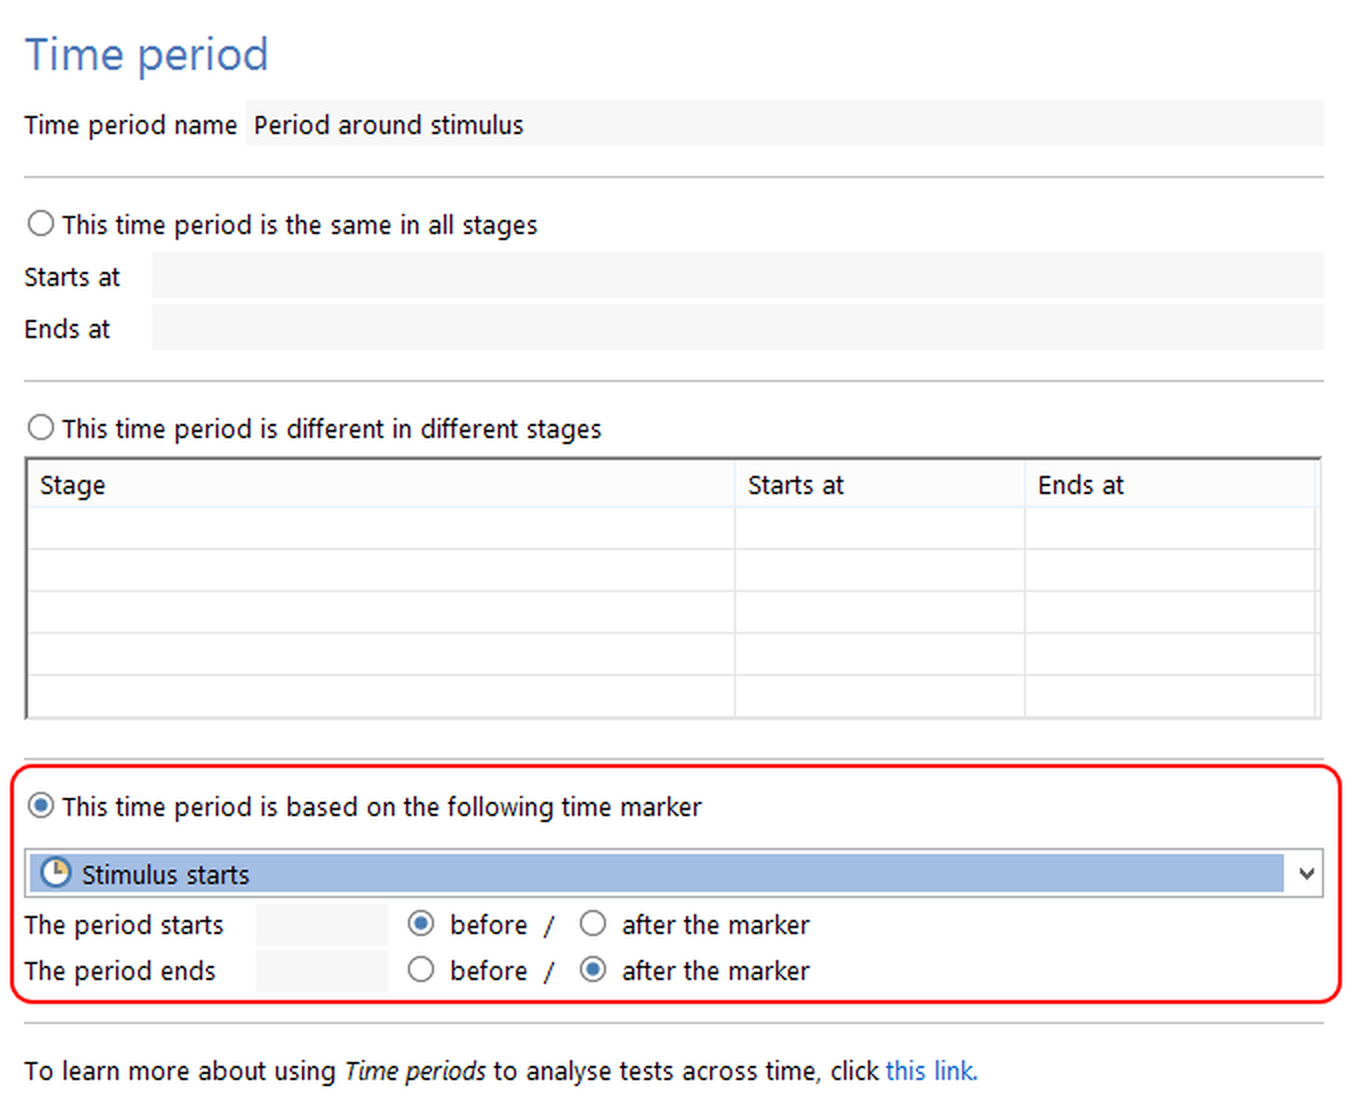
Figure 2. Using the time marker on the Protocol page, to start a time period.
For more details, see Specifying the start and end of a time period that is based the occurrence of a time marker.
Using time markers with signal inputs
In the example in figure 1 above, if you were looking to measure the change in the signal after the stimulus started, you wouldn't care about the actual value of the signal input beforehand (since its baseline value is likely to be slightly different across the animals in your test). Rather, you would be looking for the difference in value between the input after the stimulus, and before it.
But when does the baseline value for the signal get measured? ANY-maze allows you to use the average value of the signal input, up to the point defined by your time marker. To set this up, select the Signal inputs item in the protocol list, and select the signal input that you're interested in. Ensure that Baseline is signal's average value until the following time marker is checked, and then select the time marker from the drop-down list below it:
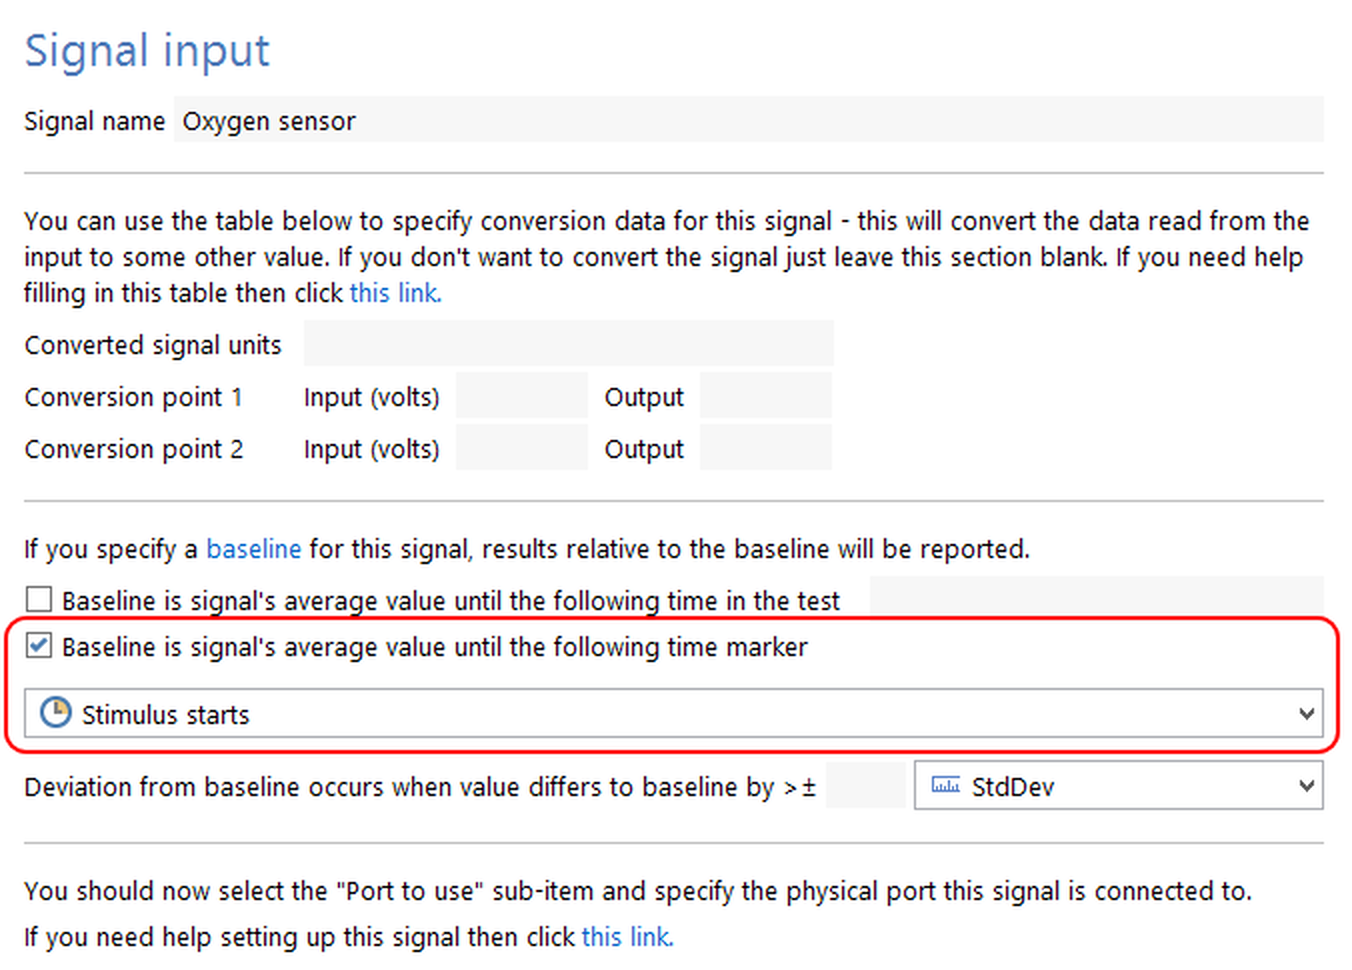
Figure 2. Using the time marker on the Protocol page to determine the baseline for the signal input.
For more details, see Setting up a signal's baseline.
![]()
© Copyright 2003-2026 Stoelting Co. All rights reserved
ANY-maze help topic T0475