ANY-maze Help > I/O devices supported by ANY-maze > Accessories designed specifically for ANY-maze > The ANY-maze multifunction remote > Using the multifunction remote in ANY-maze > Using the multifunction remote light sensor
Using the multifunction remote light sensor
![]()
Introduction
The light sensor in the multifunction remote measures ambient light levels, ranging from 0.5 lux (very dim light) to 10,000 lux (bright indoor lighting). The sensor is located on the top right of the remote, above the screen and behind a small white window.
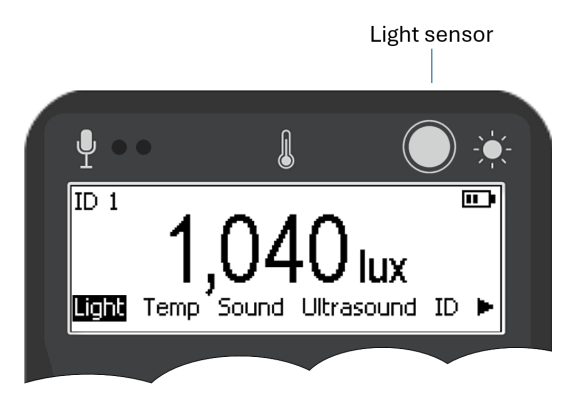
Figure 1. Location of the light sensor.
Reading light levels with the remote
| Remember, if you want to prevent the multifunction remote from going to sleep, press and hold the Next button. |
To read the ambient light level, simply select the 'Light' menu option on the remote. Within a second, the screen will display either the current light level or, if the light level is below around 200 lux, the text "Press enter to read".
In the latter case, pressing the enter button will cause the screen's backlight to switch off (so it does not affect the light level reading), the light level will then be read and the backlight will switched back on again. The light level reading will then be shown for the 'freeze' duration (see below).
Since the sensor is somewhat directional, position the remote parallel to the surface you wish to measure. For example, when measuring the light level on the surface of a water-maze, hold the remote close to and parallel with the water. Similarly, if measuring light on a wall, place the remote directly on the wall.
Freezing the light level reading
When working in light levels above around 200 lux, pressing the Enter button will freeze the current light level on the screen, and a 'Frozen' symbol will appear. The light level will unfreeze after the freeze period ends. This feature is particularly useful when you need to take a reading in a location where you can't view the screen, such as inside a sound-attenuating chamber.
When working in light levels below around 200 lux, pressing the Enter button reads the light level (see above) and then freezes the display.
Note that the sensor reports the average light level over a short period and takes about half a second to stabilise. Therefore, if you need to take a reading where you can't see the screen, place the remote in position and wait a second before pressing the Enter button to freeze the reading.
Testing the light sensor in ANY-maze
While the light level reading is 'frozen' (see previous section) pressing the Enter button on the remote will transmit the current light level to ANY-maze. To test this:
| 1. | Switch to the I/O page in ANY-maze. |
| 2. | Select the relevant multifunction remote in the list on the left, the entry will open to show the remote's sensors. |
| 3. | Choose 'Light sensors' from this list. |
| 4. | Press the Enter button on the remote. The light level will freeze. Press the Enter button again and the reading will be transmitted to ANY-maze and displayed on the I/O page (see Figure 2 below). |
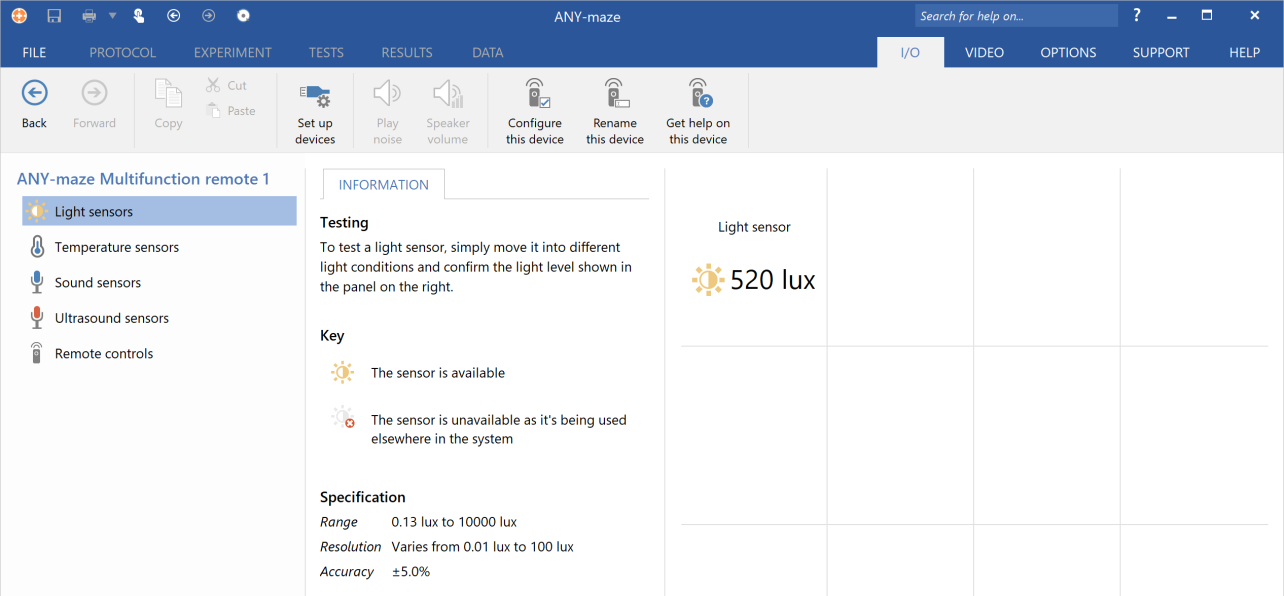
Figure 2. Testing the light sensor on the I/O page.
Recording light levels in an ANY-maze experiment
Setting up the protocol to record light levels
In an experiment, such as an open-field test, you may want to record the light level in the apparatus before each test to ensure consistency. To do this, follow these steps:
| 1. | Load your experiment into ANY-maze |
| 2. | Switch to the Protocol page and select the first item in the protocol list on the left |
| 3. | In the Protocol settings, ensure you are using a Protocol mode that includes I/O, such as the Video tracking with input/output mode. |
| 4. | Add a new I/O device to your protocol by clicking the Add item button in the ribbon bar and selecting New I/O device from the menu that appears. A new I/O device will be added to the protocol list and selected automatically. |
| 5. | Give the I/O device a sensible name, such as 'Remote control', and use the drop list to select the multifunction remote you are using. |
| 6. | Add a new sensor to the protocol by clicking Add item and selecting New input item > New sensor from the menu. The new sensor will be added and automatically selected. |
| 7. | In the protocol list click the sensor's Port to use item. |
| 8. | In the Port to use settings select the multifunction remote's light sensor. Note, you can choose the same sensor for more than one apparatus. |
| 9. | Return to the sensor item in the protocol list. |
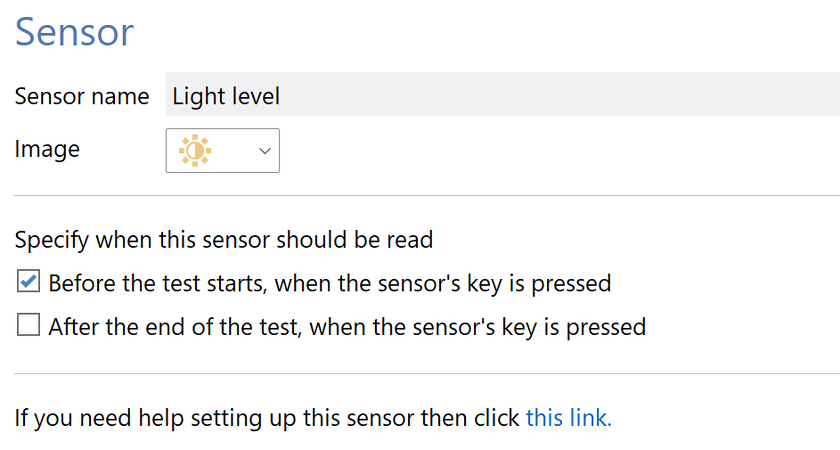
Figure 3. The Sensor settings in the protocol
| 10. | Give the sensor a sensible name, such as 'Light level'. |
| 11. | In the Sensor's settings, select the option to read the sensor Before the test starts, when the sensor's key is pressed. |
| 12. | You may also want to alter the sensor's image to make it more easily identifiable. |
Reading the light level before a test
Once the sensor is set up, you’ll see that on the Tests page tests are no longer shown as Ready..., but rather as Waiting for pre-test Light level reading (where 'Light level' reflects the name given to the sensor in step 10). To take the reading:
| 1. | Ensure the 'Light' menu option is selected on the remote. |
| 2. | Press the Enter button. |
| 3. | The light reading will be transmitted to ANY-maze, stored with the test, and the test status will change to "Ready...". The reading will also be displayed in the I/O Status panel on the Tests page (see figure 4 below). |
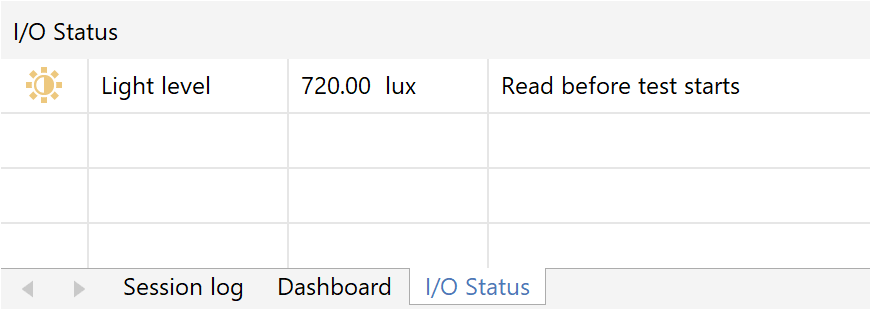
Figure 4. Viewing the light level in a test.
| 4. | If ANY-maze successfully stores the reading, the remote will provide haptic feedback indicating success. If the reading is not stored then, depending on the remote's configuration, it will either give haptic feedback indicating failure, or no feedback at all (which can be interpreted as failure). Note that the reading will ONLY be stored if the test is in the Waiting for pre-test Light level reading state, or in the Ready state when the test includes a light sensor that is set to be read before the test starts. |
| 5. | If you want to replace the reading you can simply press the Enter button again, the new reading will overwrite the original one and haptic feedback will again be provided. |
Viewing and analysing the light level readings
The light level reading is stored with the test in the data file. To view this value, include the Apparatus measures > Light level measures > Light level: initial value in a report (see figures 5, below).
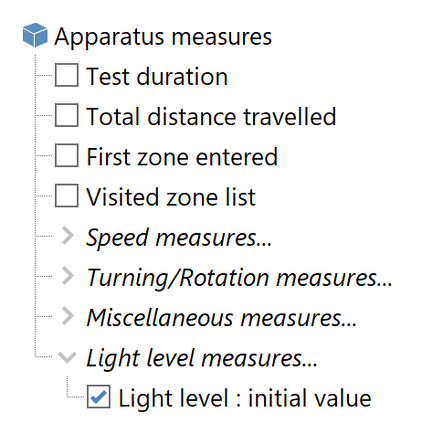
Figure 5. Selecting the light level to be included in a report.
If you wish, you can analyse the light level, for example, to ensure that there was no significant difference in the lighting between different groups of animals, as in figure 6 below.
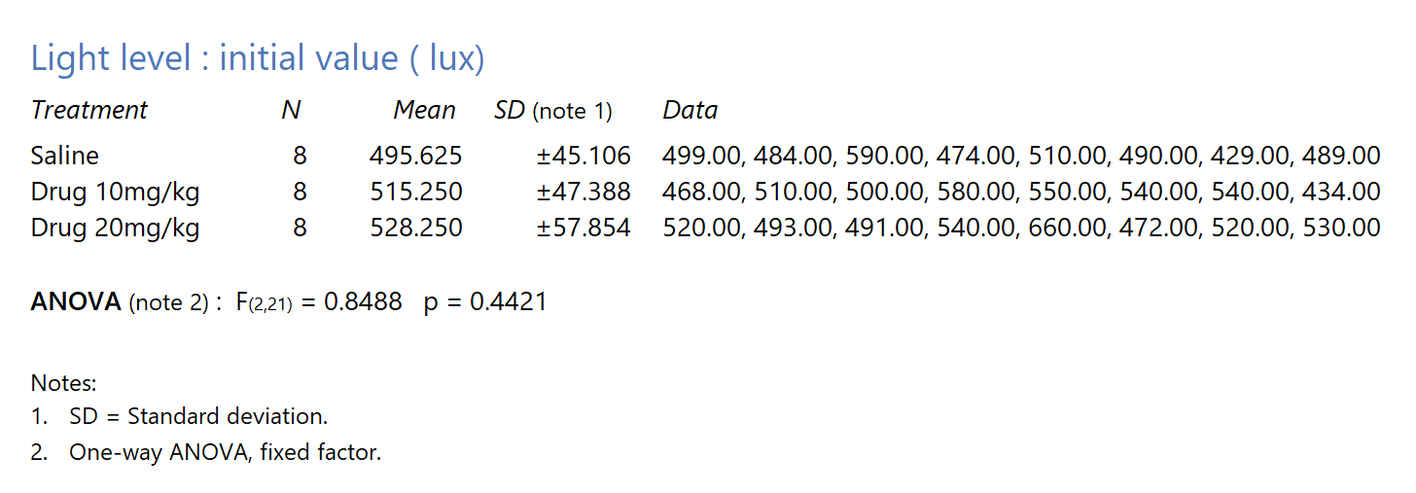
Figure 6. Analysing the light level in an experiment.
![]()
© Copyright 2003-2026 Stoelting Co. All rights reserved
ANY-maze help topic T1428