ANY-maze Help > I/O devices supported by ANY-maze > Test equipment designed specifically for ANY-maze > The Waterwheel Forced Swim Test Tank > Performing experiments with the Waterwheel Forced Swim Test tank > Running tests in a Waterwheel Forced Swim Test tank
Running tests in a Waterwheel Forced Swim Test tank

Introduction
Having set up a protocol for your Waterwheel Forced Swim Test tank, you are now ready to use it in an experiment. In this topic we'll create a very simple experiment, run a test and take a quick look at some of the results. Clearly a 'real' experiment would be more sophisticated, but you should find it easy to build on the basic experiment described here.
| • | Creating the experiment and loading the Waterwheel Forced Swim Test protocol |
| • | Adding some treatments and animals |
| • | Specifying the animals' treatments |
| • | Performing a test |
| • | Viewing the test results |
Creating the experiment and loading the Waterwheel Forced Swim Test protocol
If you have just completed the steps in Setting up a Waterwheel FST protocol, then you won't need to do anything here, as you will already have an experiment open which will contain the Waterwheel Forced Swim Test protocol. Otherwise, you will need to do the following:
| 1. | Switch to the File page. |
| 2. | If there's currently a file open, then select New experiment in the list on the left side of the page (otherwise, just move on to the next step). |
| 3. | The right side of the page will show a list of 'documents', one titled New empty experiment and others with the names of the protocols you have recently used. |
| 4. | Click the 'document' for the Waterwheel Forced Swim Test protocol you saved earlier (if you didn't save a protocol earlier, then go back and set up a protocol for your Waterwheel Forced Swim Test tank and save the protocol at the end). |
Adding some treatments and animals
With the Waterwheel Forced Swim Test protocol loaded, you can add the treatment groups and animals for your experiment. We're going to add just two groups with 2 animals each, but of course you could set up a more sophisticated experiment.
| 1. | Switch to the Experiment page. |
| 2. | On the right-hand side of the page, enter a treatment of 'Drug' with an 'N' of 2, and a treatment of 'Saline', also with an 'N' of 2 - as in figure 1, below. |
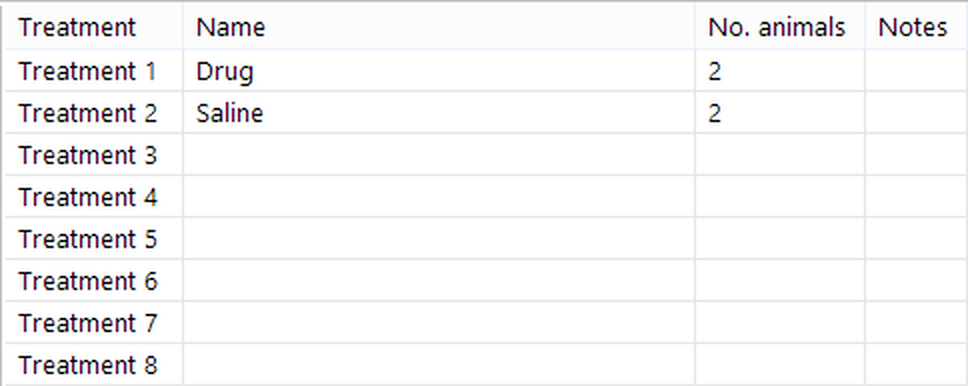
Figure 1. The 'Treatments' section of the Experiment page is used to add treatment groups to an experiment.
Specify the animals' treatments
Although in the previous step you will have specified the different treatment groups that your experiment will include, and the number of animals within each group, this doesn't actually tell ANY-maze which animal should be given which treatment - for example, Animal 1 should have which treatment - the first one? And animal 2, the first treatment too?
So, the next thing you need to do is specify which treatment each animal should receive. In fact, as well entering the animal's treatments, you can at the same time specify other information about them, such as their weight or sex - this depends on whether you included any Fields when you set up your protocol.
To enter the data about the animals' treatments, you should:
| 1. | Remain on the Experiment page |
| 2. | Click the  View animals button in the ribbon bar View animals button in the ribbon bar |
| 3. | The page will change to show details of the animals - see figure 2 |
| 4. | Enter the animals' treatments (and any additional data) into the spreadsheet cells |
| 5. | If you want to view the treatments again, just click the  View treatments button View treatments button |
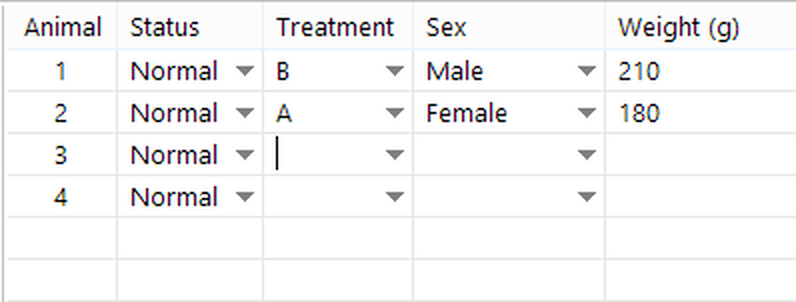
Figure 2. The 'Animals' spreadsheet. In this example, the protocol includes fields for the animals' sex and weight, so the spreadsheet includes columns for this data.
When entering the animals' treatments, you need to specify the treatment code. This is because by default, ANY-maze performs experiments blind, so you don't know which treatment is which. Of course someone has to know this, and you can find out what the treatment codes are by clicking the  Reveal treatment coding button in the ribbon bar.
Performing a test
 | The details given in this section assume you will use an animal to run this test, but you can use your hand if you prefer; to do this, just periodically turn the waterwheel to simulate an animal trying to escape from the tank.. |
You're now ready to perform a test.
| 1. | Switch to the Tests page by clicking on the Tests tab above the ribbon bar. |
| 2. | The left side of the Tests page will show the Test schedule report. This report will show you a list of the tests that you are going to perform in your experiment - see figure 3. |
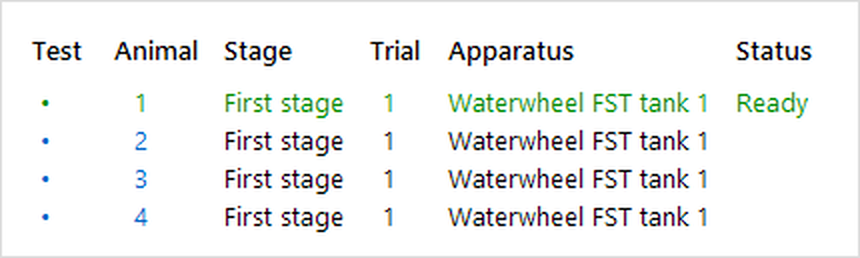
Figure 3. The Test schedule report lists all the tests in an experiment. Here the next test to perform will be a test on Animal 1, and the system is ready to start the test.
| 3. | On the right-hand side of the page, you will see a large, typically green, rectangle with the word 'Ready...' inside it and above that a status that says 'Animal 1 - Ready...' - this means you are ready to perform the test. However, you might find that instead of a status of 'Ready...', you may see something else, for example 'Temperature sensor not plugged in', in which case you should resolve whatever the problem is (in this case, plug in the temperature sensor) and the status will automatically change to 'Ready...'. |
| 4. | Once the tank is 'Ready...', drop the animal into the tank and then either press the button on the top of the tank, or click the  button shown just above the status on the screen. button shown just above the status on the screen. |
| 5. | The test clock will start to run, the green rectangle will change to orange and will show turns of the waterwheel and the water temperature, as in figure 4, below. |
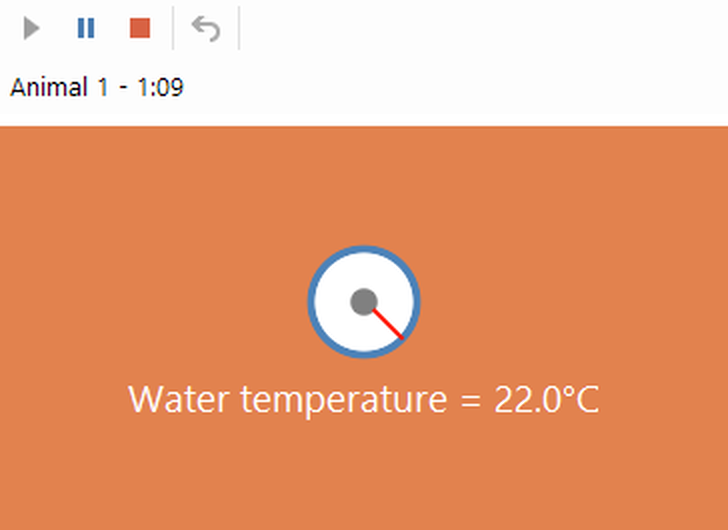
Figure 4. During a test, ANY-maze will show turns of the waterwheel and the temperature of the water.
There's nothing for you to do while a test is running - which makes it very easy to run multiple tests simultaneously, as you could move on to another tank and start a test there.
| 7. | When the test duration expires, the test will end automatically and ANY-maze will get ready for the next test - and you'll see this in the Test schedule report. |
You can stop your experiment at any point (except when a test is actually running) and close the experiment file; when you reopen the experiment, testing will just pick up from where you left off.
You may notice that there's an LED built into the button on the top of the tank - this LED indicates the status of the test running in the tank, as follows:
| Green | Ready to start a test |
| Red flashing | There's some problem which is preventing a test from being started - refer to the computer screen to see what the problem is |
| Orange | A test is running. (So when you press the button to start a test, you expect the LED to change from Green 'Ready' to orange 'Testing') |
| Orange flashing | A test is paused |
| Not lit | The tank has no test to perform |
Viewing the test results
After performing a test, you can view its results using the Test schedule report shown on the left side of the Tests page.
| 1. | Click on the 'Test number' of the test whose result you want to view - as in figure 5. |
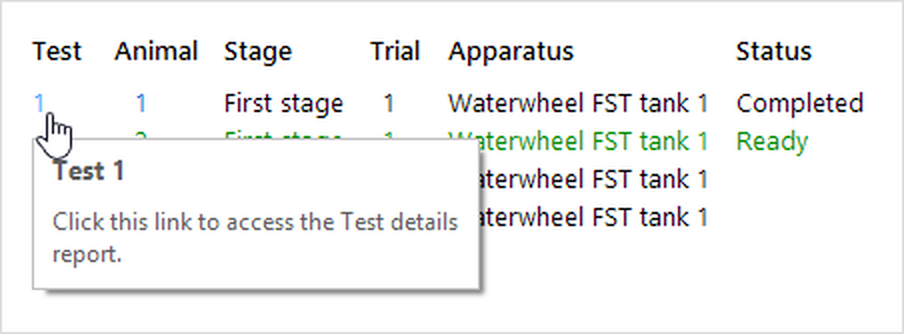
Figure 5. The test numbers on the Test schedule report are links; clicking one will take you to the Test details report.
| 3. | The Test details report will open. This report includes various sections, but what interests us are the Results - see figure 6. |
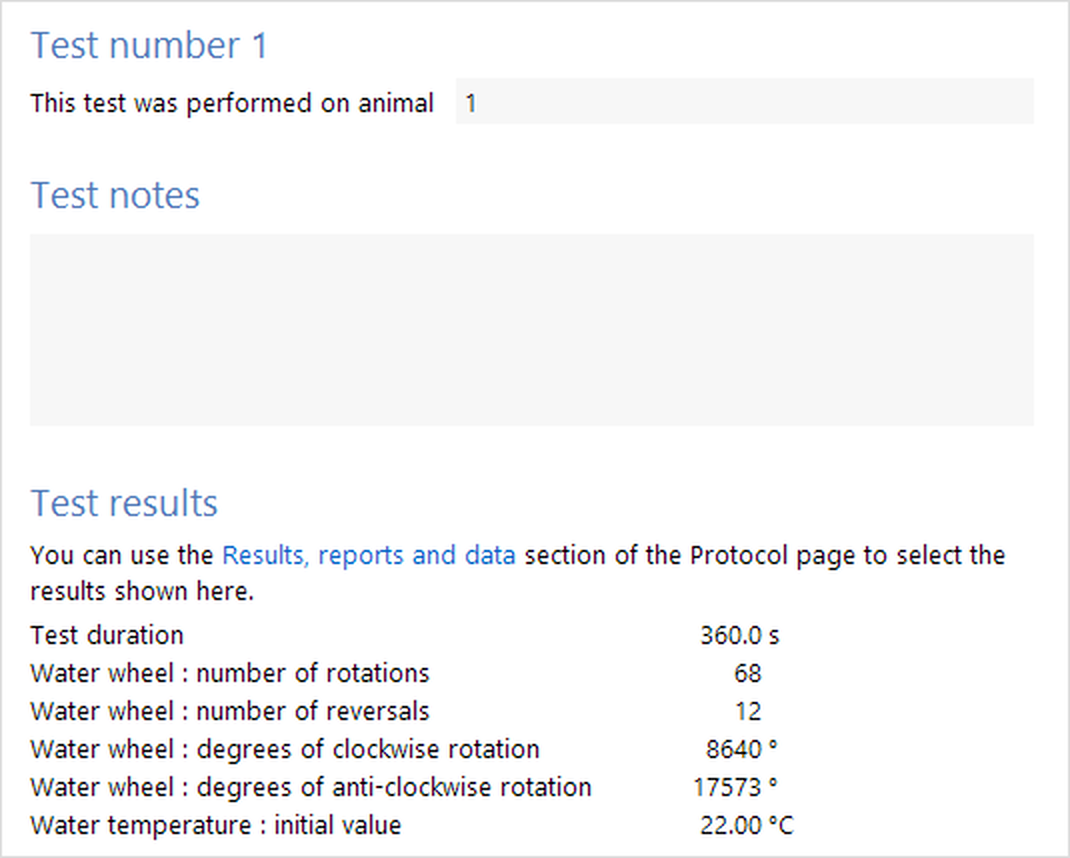
Figure 6. The Test details report includes results of the test.
As can be seen in figure 6, various results are shown, including such things as the total number of rotations of the waterwheel and the number of reversals of the wheel's direction.
In fact many other results are also available, and you can tailor this list by clicking the link shown just above the result values. Any changes you make become part of the protocol, so they'll apply to all the tests in the experiment and, if you save the protocol, to all experiments that use the protocol.
What next?
In this topic, we learnt how to perform tests in the Waterwheel Forced Swim Test tank and we also looked at the results of an individual test. However, ANY-maze can do much more than just show you the results of each test individually, and this is what we'll explore in the final section of this tutorial - Analysing the results of Waterwheel Forced Swim Test experiments
See also:
 | The topics listed below are general topics relating to ANY-maze, and may refer to features not available or required with Waterwheel Forced Swim Test. |
| • | Using the test schedule report |
| • | Running tests |
| • | Resolving common problems |
| • | Recording data about animals and tests |
| • | Test details report |

© Copyright 2003-2026 Stoelting Co. All rights reserved
ANY-maze help topic T1226